Categories & Conditions
Build and arrange the categories and conditions inside a guideline set.
Overview
After you create a Guideline Set, use categories and conditions to build the actual review structure.
Categories are the major areas of review, such as Accessibility, Usability, Recovery, Customization, Navigation, or Visual Design. Conditions are the individual checks evaluators answer inside those categories.
This page covers the working layer of Guidelines: adding categories, adding conditions, dragging items into the right order, moving conditions between categories, and deciding when to edit, exclude, or delete a condition.
Recommended Workflow
Build the set in this order:
- Create broad Categories for the kinds of UX issues you want to track.
- Add Conditions to the category where they best belong.
- Drag Categories into the order evaluators should review them.
- Drag Conditions within a category so related checks stay together.
- Drag Conditions between categories when a check belongs somewhere else.
- Exclude conditions you do not want in the next evaluation.
- Delete only when the condition or category should be removed from the set.
This keeps the set easy to review, easier to maintain, and more useful in Analytics later.
Categories
Use categories to group related conditions by issue type. A category is not a scoring status. It is the label, color, and grouping that helps people understand what kind of problem they are looking at.
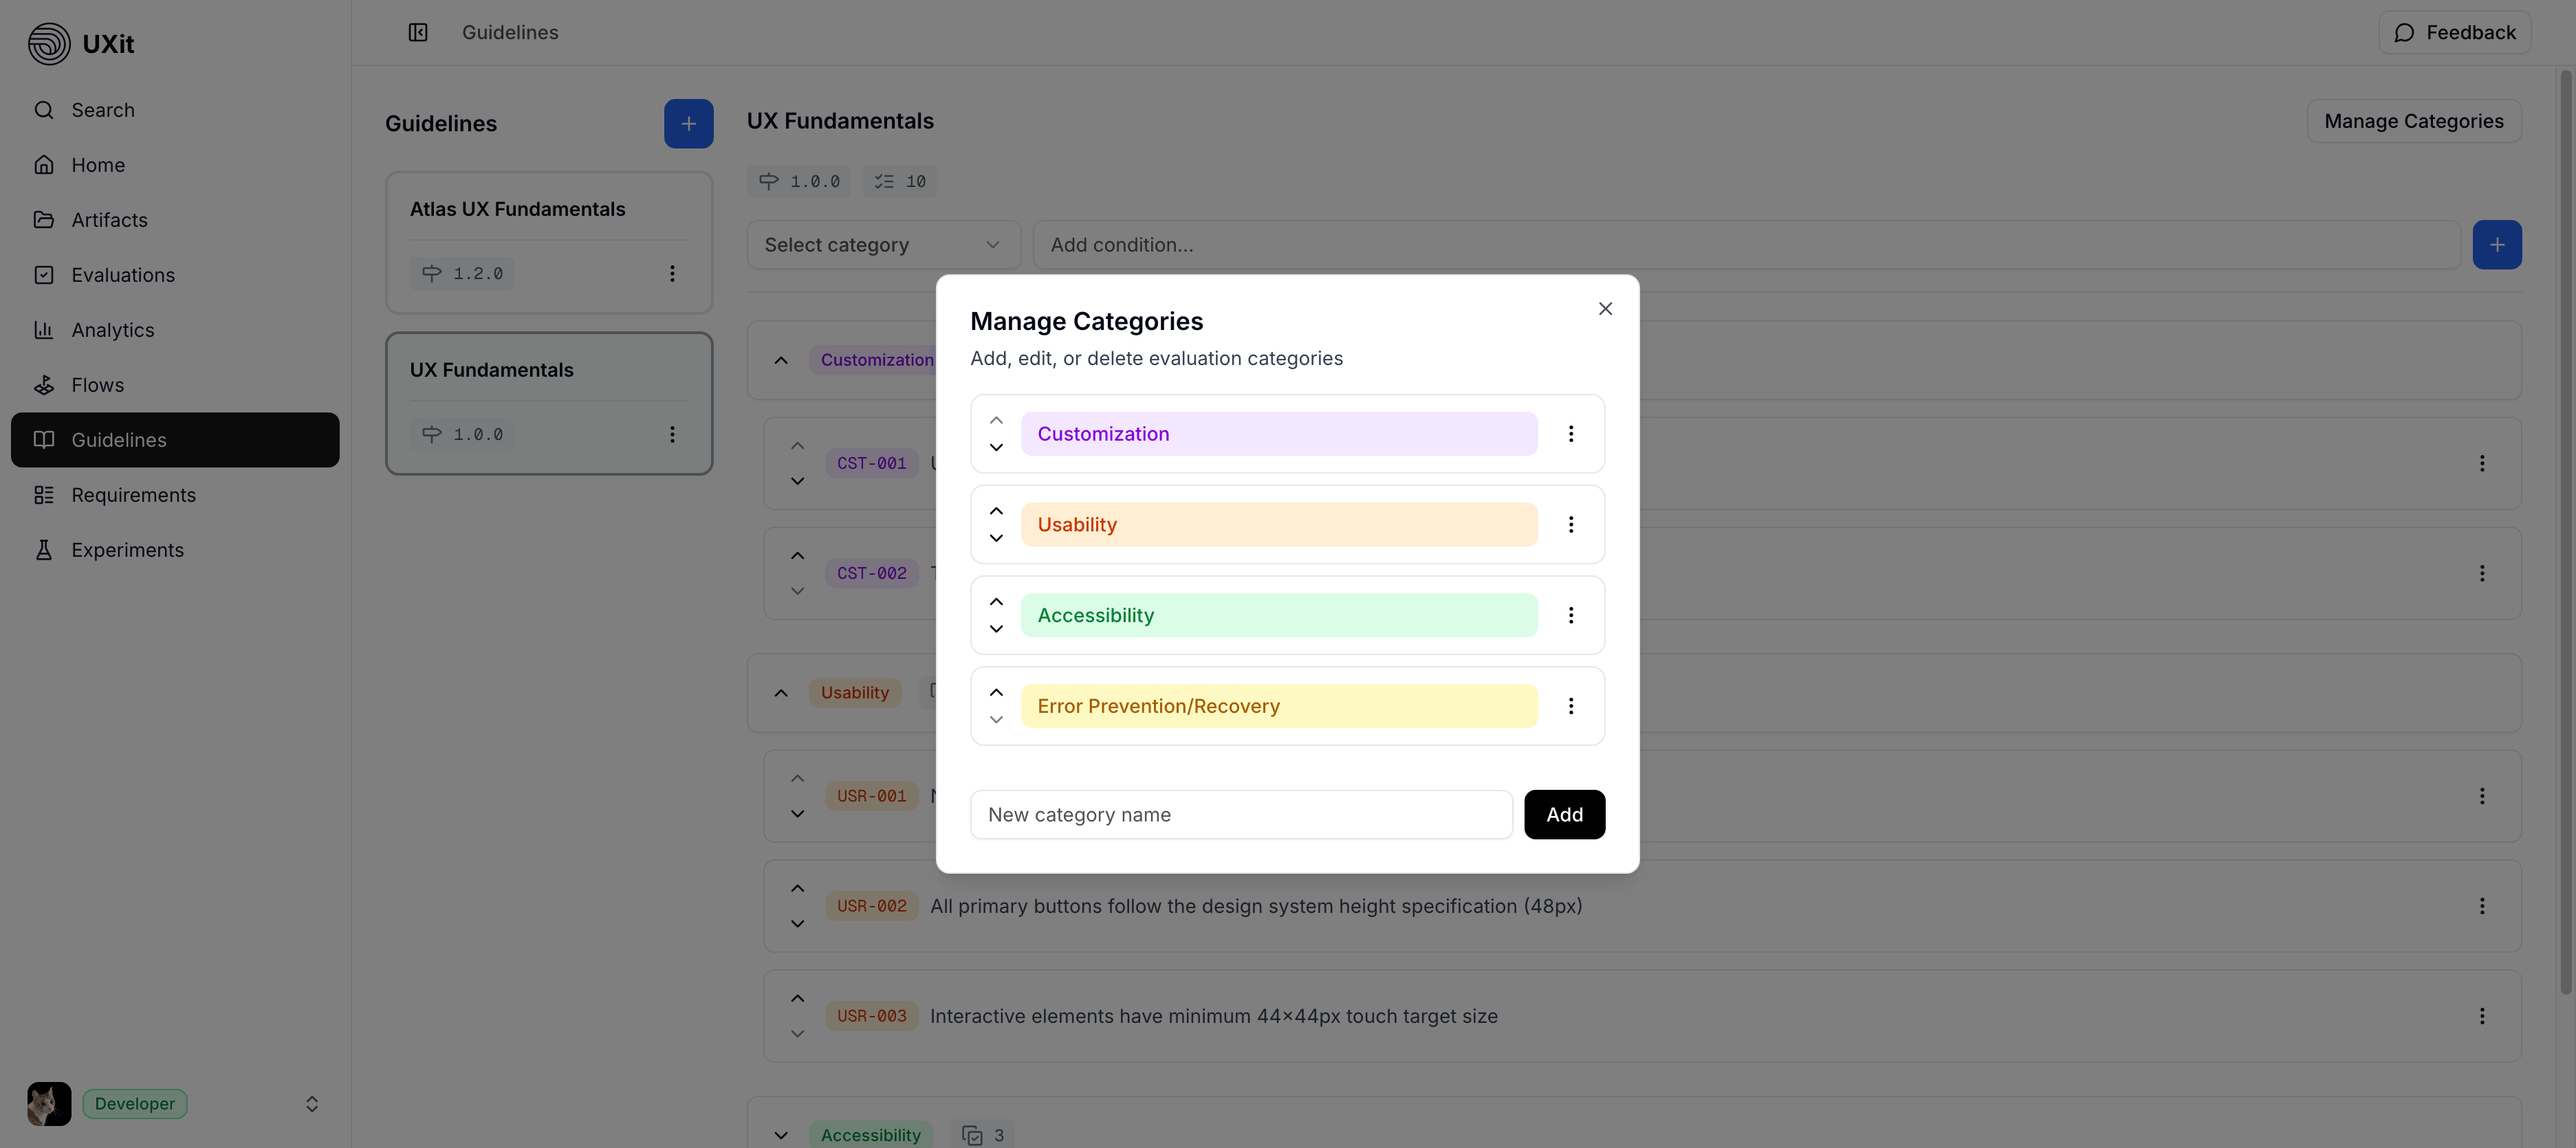
To add a category:
- Open
Guidelines. - Select the
Guideline Setyou want to update. - Click
Manage Categories. - Enter the category name in
New category name. - Click
Add.
Use the category action menu to:
Renamea category when the label needs to be clearer.Change Colorwhen the category needs a different identification color.Deletea category only when the category and its conditions should be removed.
Deleting a category is permanent
Deleting a category also deletes the conditions inside it. This cannot be undone.
Category Colors
Category colors are for identification. They do not change score math, pass/fail state, priority, or severity. Their value is consistency across the platform: the same category color helps people connect related work as they move through:
Guidelines, where the category and condition are defined.Evaluations, where the evaluator answers each condition.Analytics, where category results are compared and traced back to specific conditions.Handoff, where findings need to stay easy to recognize for clients, teammates, or developers.
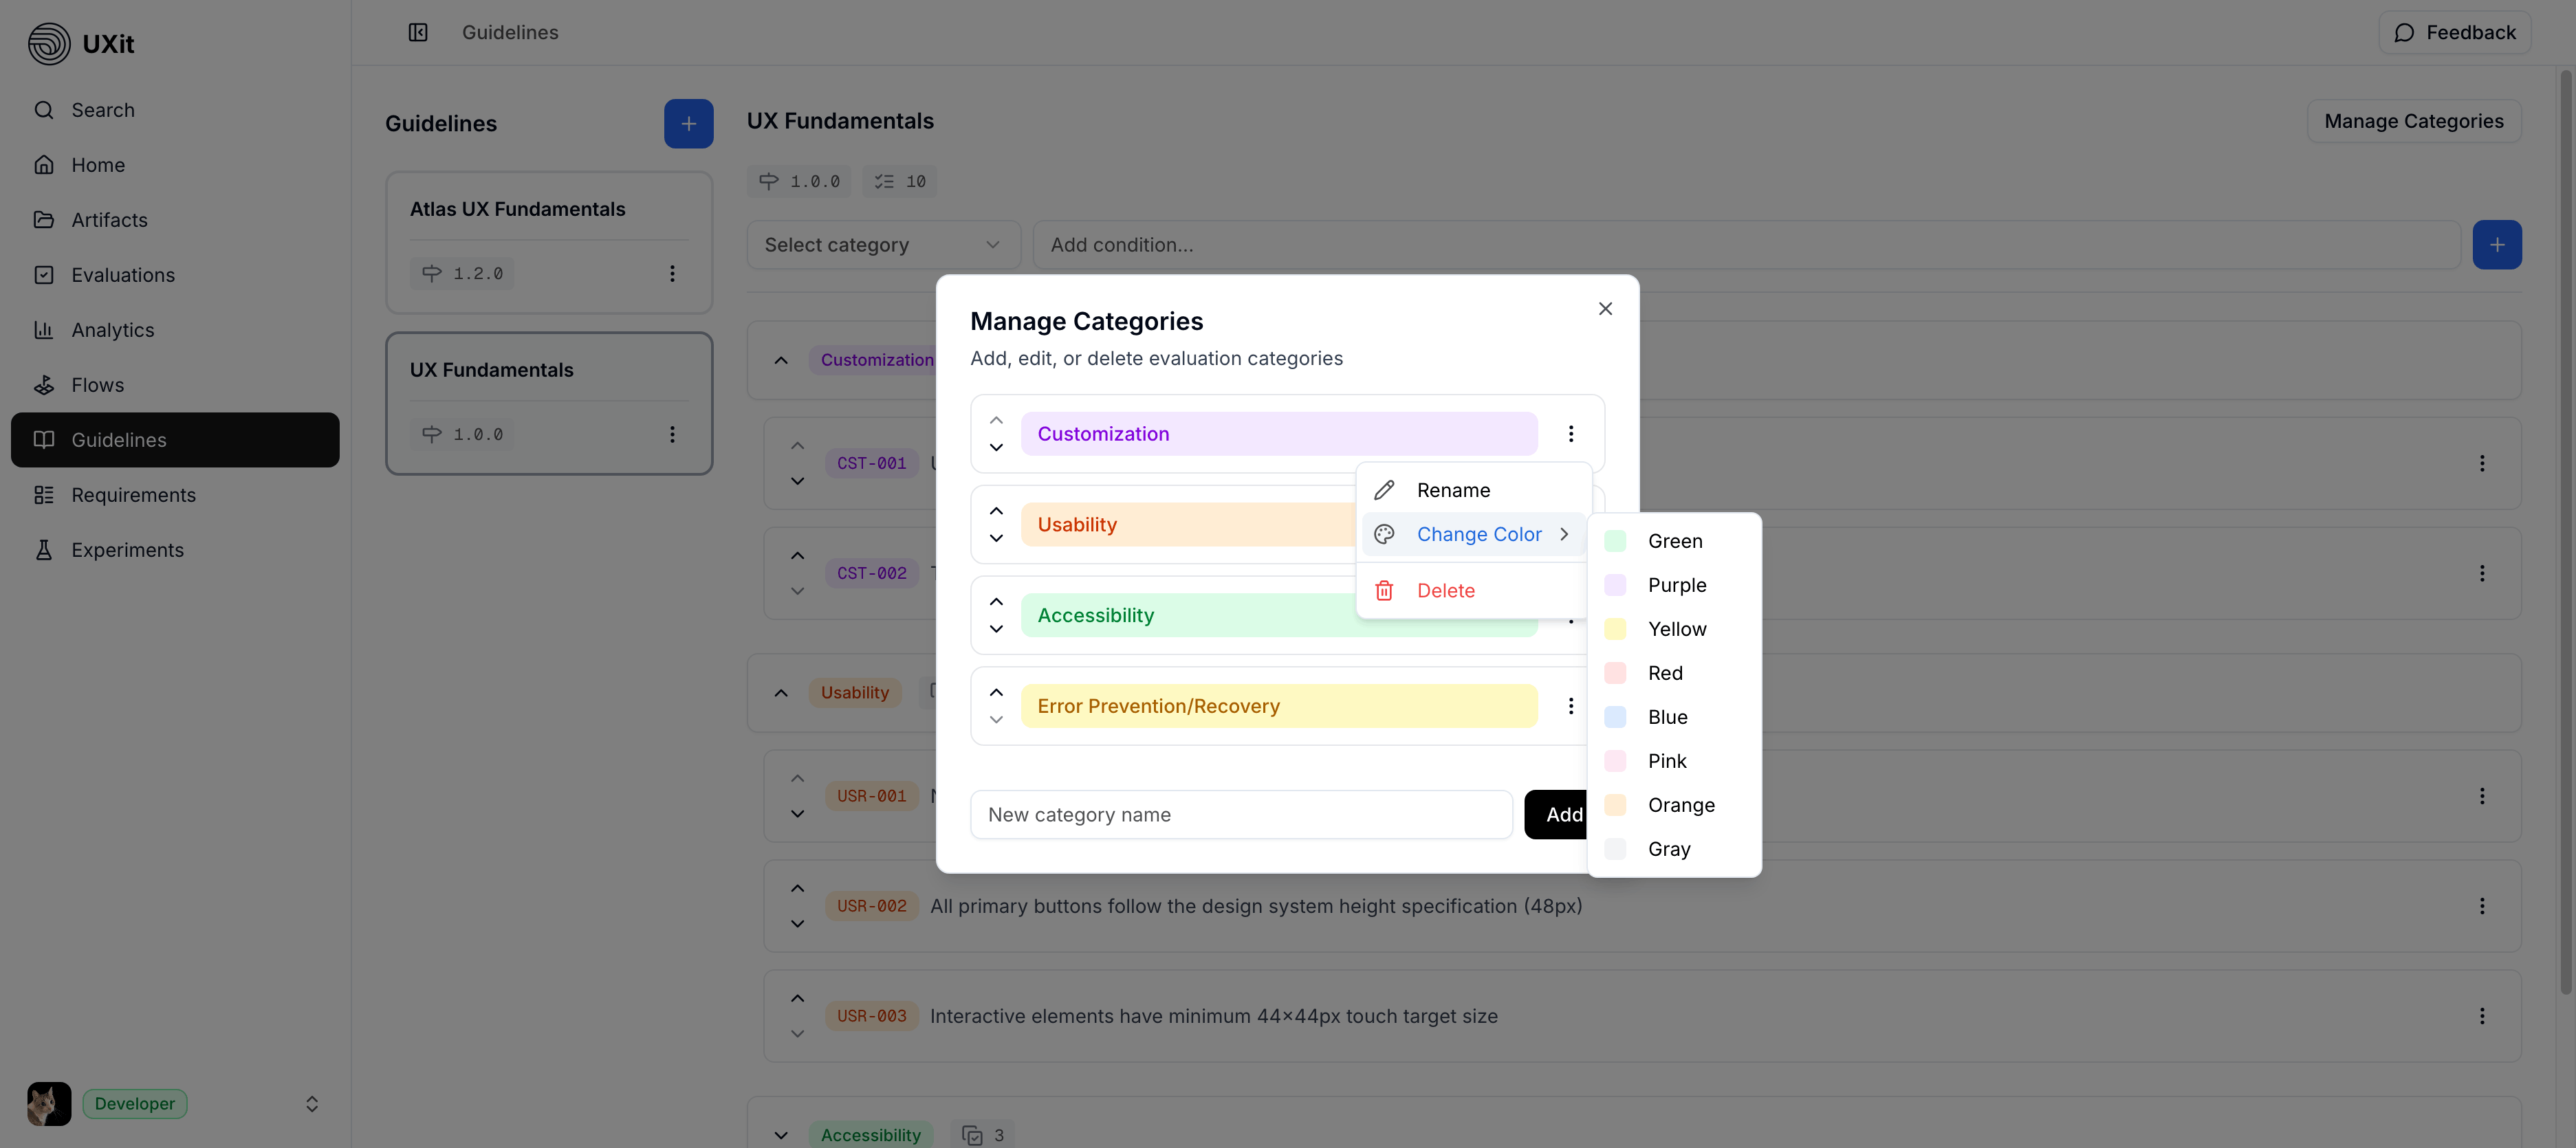
To change a category color:
- Open
Manage Categories. - Open the category action menu.
- Choose
Change Color. - Select
Green,Purple,Yellow,Red,Blue,Pink,Orange, orGray.
Add Conditions
Conditions are the checks evaluators answer during an Evaluation. Add each condition to the category that best describes the kind of issue it measures.
To add a condition:
- Use
Condition Categoryto choose the category. - Enter the condition in
Add condition.... - Click
Enteror the plus button.
Examples:
Category: Accessibility
Condition: Text meets minimum contrast requirements.

Category: Recovery
Condition: Users can recover from a validation error without losing their work.

Category: Usability or Visual Design
Condition: Primary actions are visually distinct from secondary actions.
Drag & Drop Organization
How dragging works
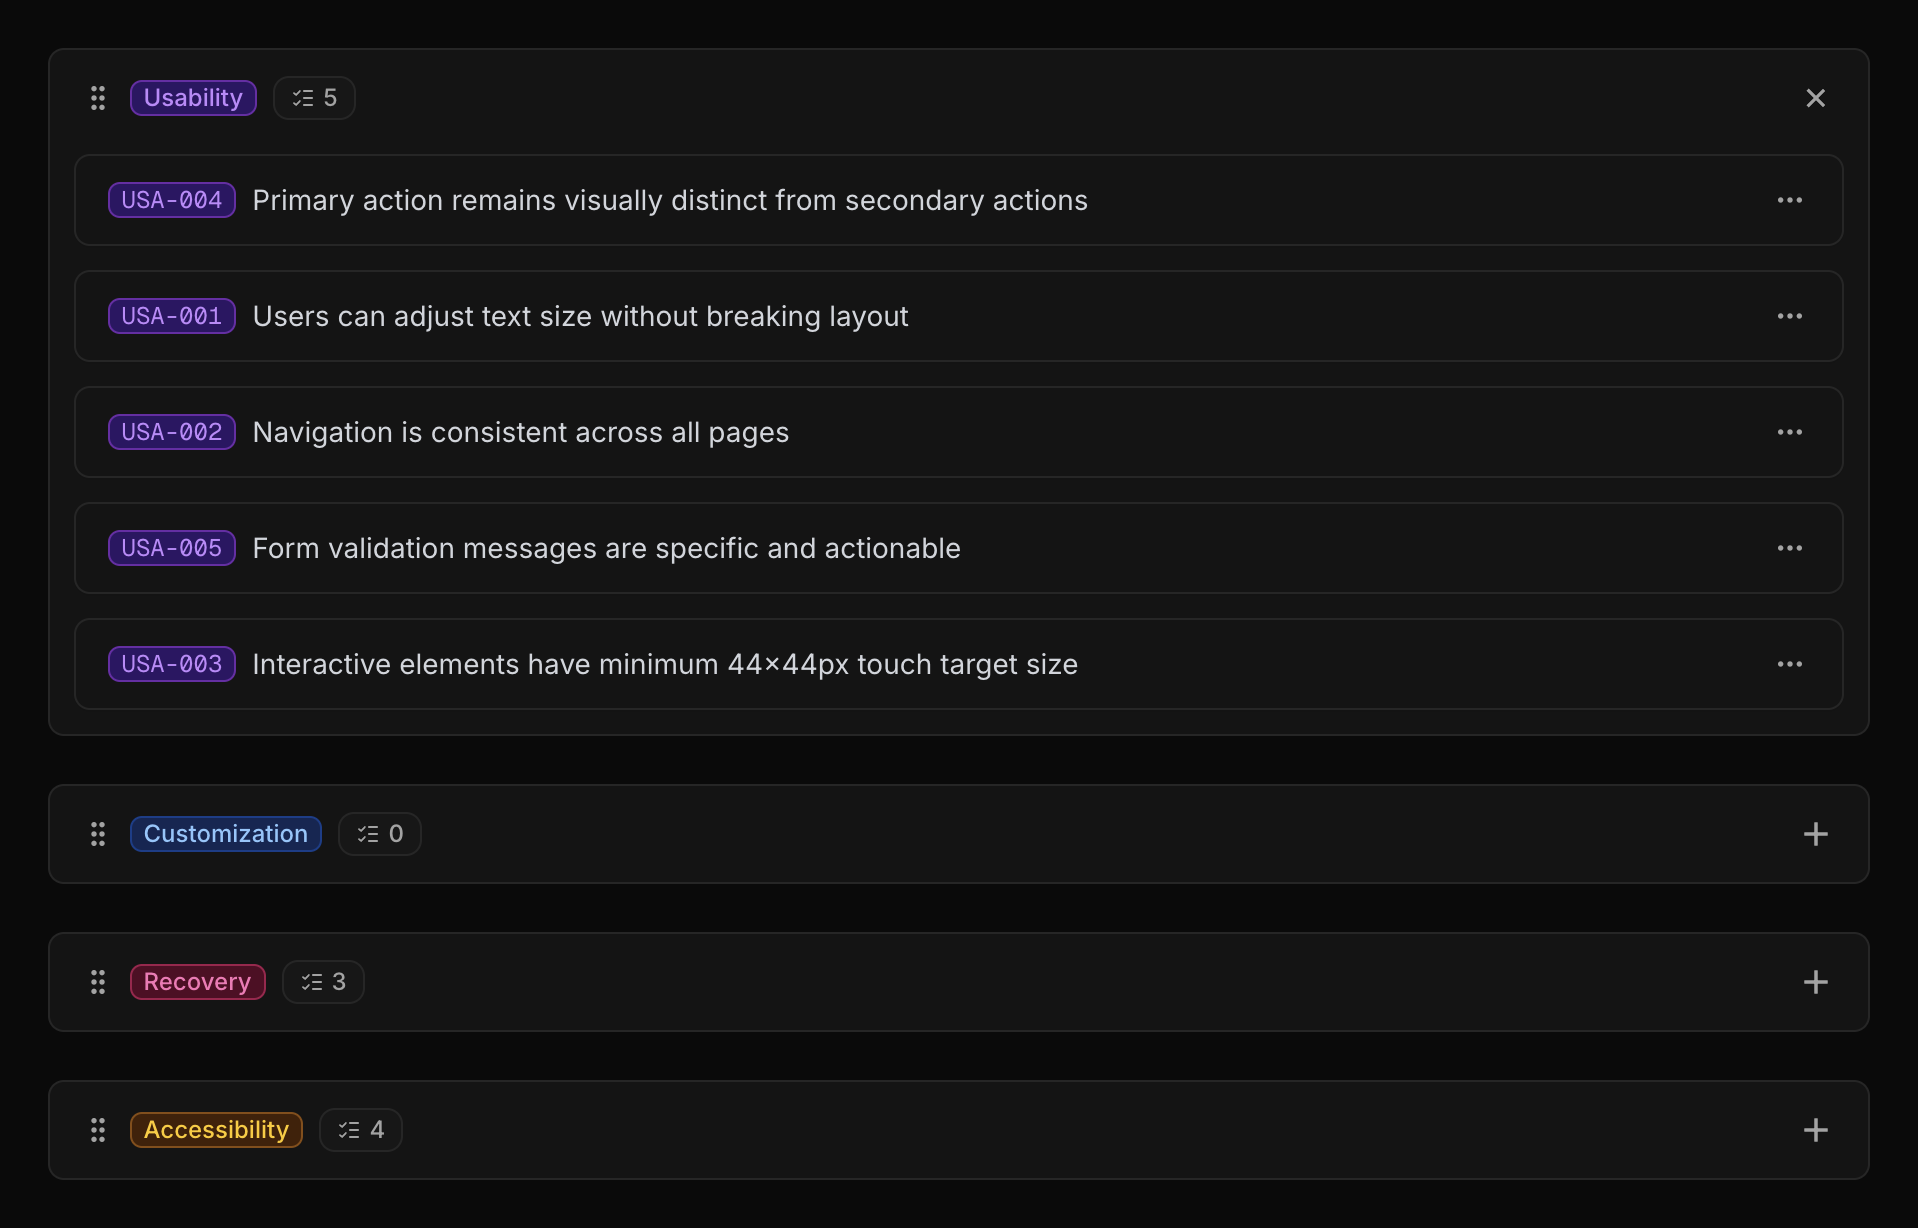
For categories, drag from the grip handle at the top-left of the category row. For conditions, move over the condition row until the cursor changes to a grab cursor, then drag the row where it belongs.
The main Guidelines board supports drag and drop so large sets stay manageable. This is useful when a set grows beyond a few simple checks and you need to reorganize without manually rewriting IDs or rebuilding categories.
You can drag categories to change the review order, drag conditions within a category to group related checks, or drag a condition into a different category when it fits better somewhere else. If you prefer step-by-step category movement, use the up and down arrow controls in Manage Categories.
Condition IDs When Moving
Condition IDs are based on category prefixes. When you drag a condition to another category, UXit can update the ID so it matches the destination category.
By default, both move preferences are enabled in Settings -> Customization -> Guidelines:
Update prefix on movechanges the ID prefix to match the destination category.Renumber ID on moveassigns the next unused number in the destination category.
For example, a condition like USA-003 moved from Usability to Accessibility can become the next available ACC ID. If the destination category already has ACC-001 through ACC-004, the moved condition can become ACC-005.
These settings help condition IDs stay useful in Analytics, Handoff, tickets, and follow-up review conversations. If your team wants to preserve old IDs instead, review those settings before reorganizing a large set.
Edit, Exclude, Delete, or NA
Use the condition row Actions menu for condition-level maintenance.
Edit Condition
Use Edit Condition for small wording cleanup, typo fixes, or clarification that does not change what the condition measures.
If the edit changes the meaning of the condition, consider duplicating or versioning the Guideline Set first so historical comparisons stay clearer.
Exclude Condition
Use Exclude Condition when:
- A condition is temporarily not relevant to the design being evaluated.
- You found a duplicate but are not ready to permanently remove it.
- You are unsure whether the condition belongs in the set.
- You want the next evaluation to ignore the condition without changing the rest of the set.
An excluded condition does not appear in the evaluation workspace and is not included in the score math for that run.
Delete Condition
Use Delete Condition when:
- The condition is wrong and should not remain in the set.
- The condition is obsolete and no longer belongs in future evaluations.
- You are cleaning up a duplicate and do not need to preserve it.
NA (not applicable)
Use NA during an Evaluation when a visible condition does not apply to that specific design or screen.
NA removes that answer from the score math for that evaluation only. It does not change the saved Guideline Set, and it does not stop the condition from appearing in future evaluations.
Best Practices
- Use categories for issue types, not every individual screen.
- Keep category colors stable when teams use them to recognize findings across
AnalyticsandHandoff. - Drag conditions into the category where the issue will make the most sense later.
- Keep related conditions together so evaluations feel faster and less repetitive.
- Review
Update prefix on moveandRenumber ID on movebefore reorganizing a large set. - Duplicate or version the
Guideline Setbefore large category or condition changes if you need clean historical comparison.