Use Cases
Split a requirement into scenarios and acceptance criteria.
Overview
A Use Case is a focused user scenario within a Requirement.
Use cases turn a broad requirement into concrete scenarios your team can review, discuss, and validate. Each one should represent a single user goal, not an entire feature set.
Think of a use case as the working scenario for the requirement: it gives the team a clear slice of the experience to describe, refine, and make testable with acceptance criteria.
Use Cases And Swimlanes
In workflow or UML-style mapping, teams often give each use case its own swimlane and place the related acceptance criteria in that lane. The scenario stays the anchor; the lane is just a familiar way to lay it out. At a higher level, multiple lanes can connect to show how more complex experiences move from one use case to the next.
┌─────────────────────────────────────────────────────────┐
│  Use Case: Complete Checkout                            │
├─────────────────────────────────────────────────────────┤
│                                                         │
│  User      →  Review Cart  →  Enter Payment  →  Done    │
│                                                         │
│  System    →  Validate     →  Process        →  Confirm │
│                                                         │
└─────────────────────────────────────────────────────────┘
Flows In Context
A flow, user flow, or UX flow map shows how a user moves from one action to the next to complete a use case.
Use cases define the goal. Flows show the path through the experience. Acceptance criteria define what needs to be true along the way.
Use Case: Complete checkout
    ↓
User reviews cart
    ↓
User enters payment details
    ↓
User confirms order
Where Use Cases Live
Use cases are created and managed from within a selected requirement. There is not a separate top-level Use Cases workspace.
To create a use case:
- Open Requirements.
- Select a requirement.
- In the requirement detail view, click New UC.
- Enter the use case details.
- Click
Create

After Creation
When you create a use case:
- It is added to the left-side use case list.
- It is automatically assigned a code such as
UC-001,UC-002, and so on within that requirement. - It becomes the active selected use case.
- You can immediately start adding acceptance criteria from the main pane.
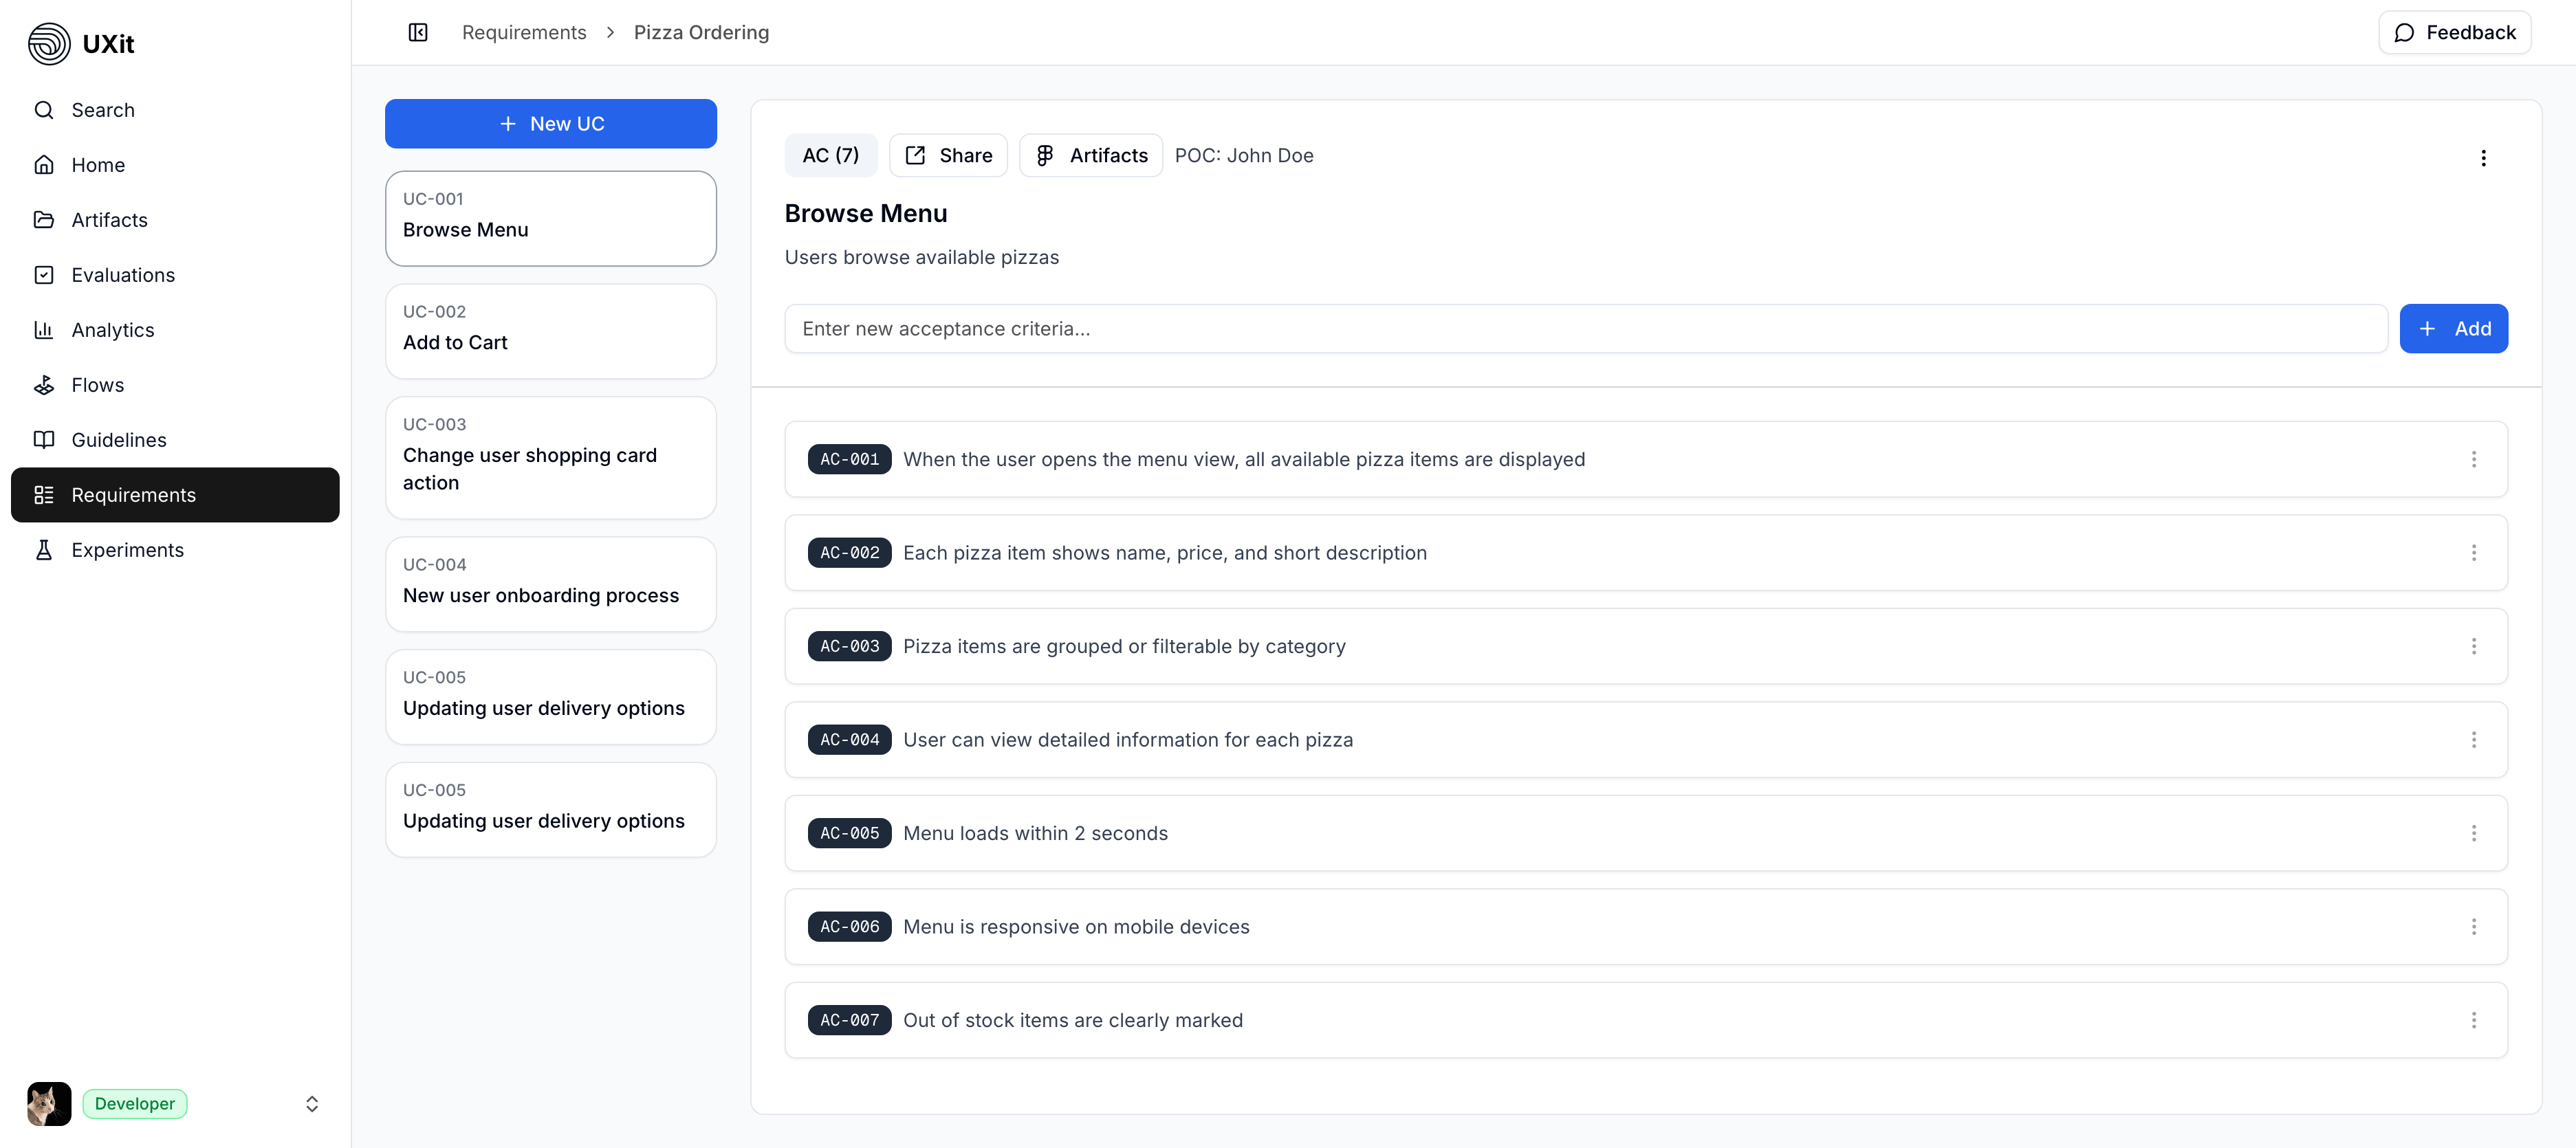
Use Case List Behavior
The left-side list acts as a lightweight navigator for the requirement.
Each use case appears as a compact card that shows:
- The use case code
- The use case title
Tip
The use case code (for example UC-001) is a short, stable handle you can drop into Jira, other trackers, email, or chat. Teams often use it alongside links so tickets and threads stay easy to scan and search.
Click a use case in the list to switch the main pane to that scenario.
If a requirement does not have any use cases yet, the interface prompts you to create one.
Artifacts
Use Artifacts (external design artifacts) to open a linked external source in a new tab, such as a Figma file, Jira ticket, Miro board, or another reference link associated with the use case.
Info
The Artifacts button is enabled only when a design link has been added to the use case.
Use Cases And Acceptance Criteria
A use case gives acceptance criteria a clear place to live.
- A Use Case defines the scenario being described.
- Acceptance Criteria capture the behaviors that scenario should support.
- You add and manage acceptance criteria while viewing the selected use case.
Some use cases only need a few acceptance criteria. Others may need many, depending on how much of the experience has been designed and how much detail the team needs to capture.
This keeps each scenario and its expected behaviors together in one working view.
Example Structure
Requirement: Mobile pizza ordering app

Use Case: Browse pizza types
  └── User opens app and views available pizzas

Use Case: Add pizza toppings
  └── User selects a pizza and customizes toppings

Use Case: Complete checkout
  └── User reviews order and completes payment
Example With Acceptance Criteria
Use Case: Browse menu

Acceptance Criteria:
- User can view a list of available pizzas.
- Each pizza shows a name, price, and short description.
- Pizza options can be grouped or filtered by category.
Manage Use Cases
Open the use case action menu to manage an existing use case.
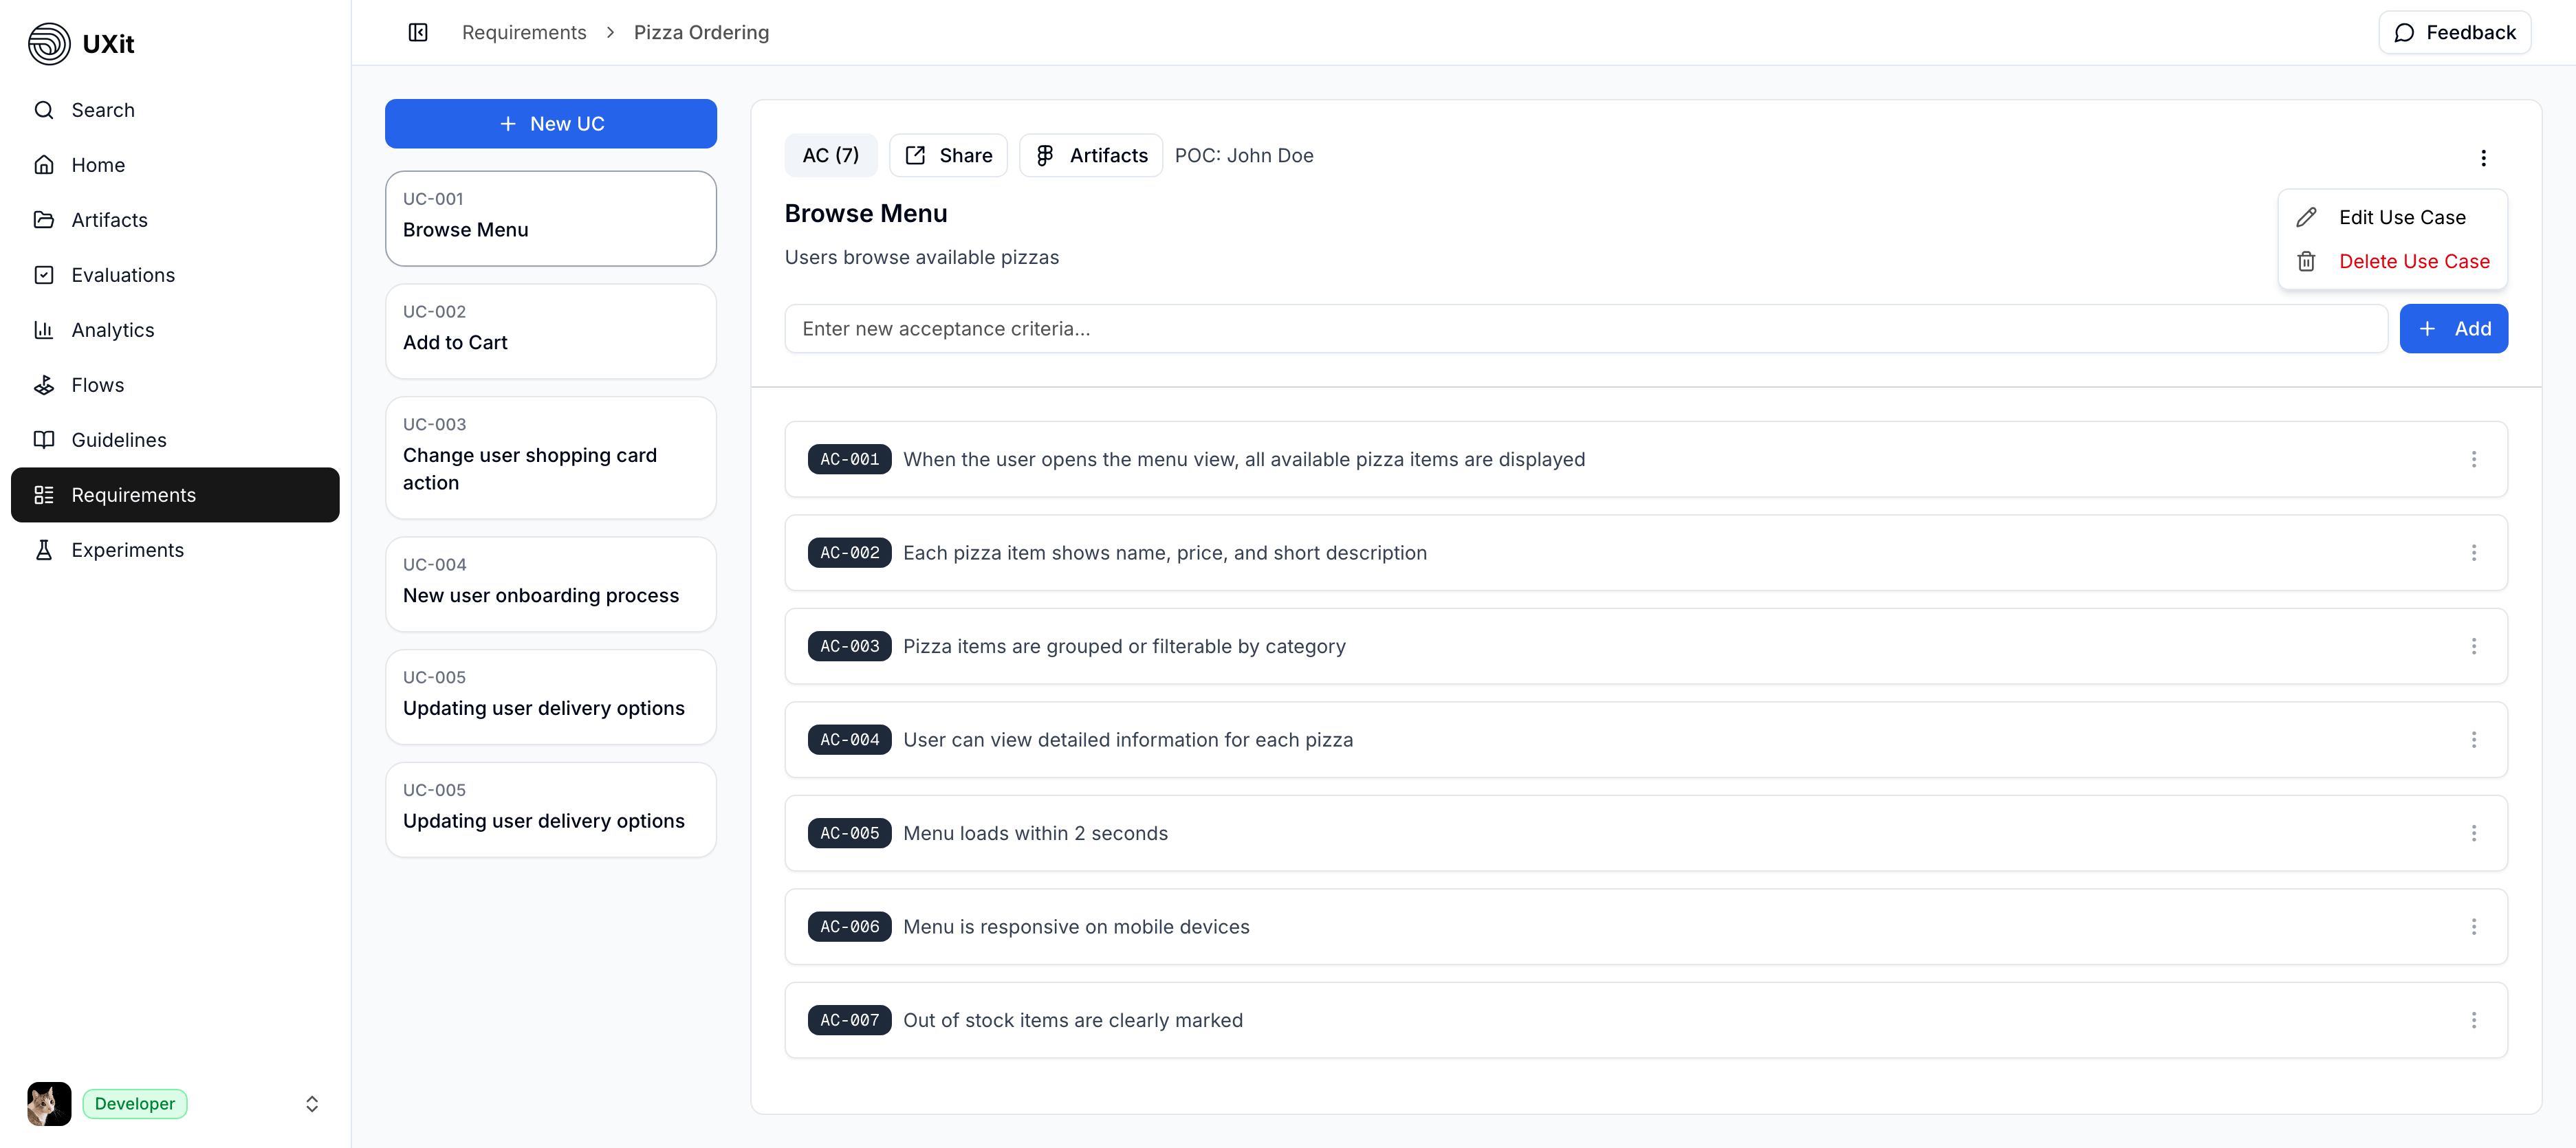
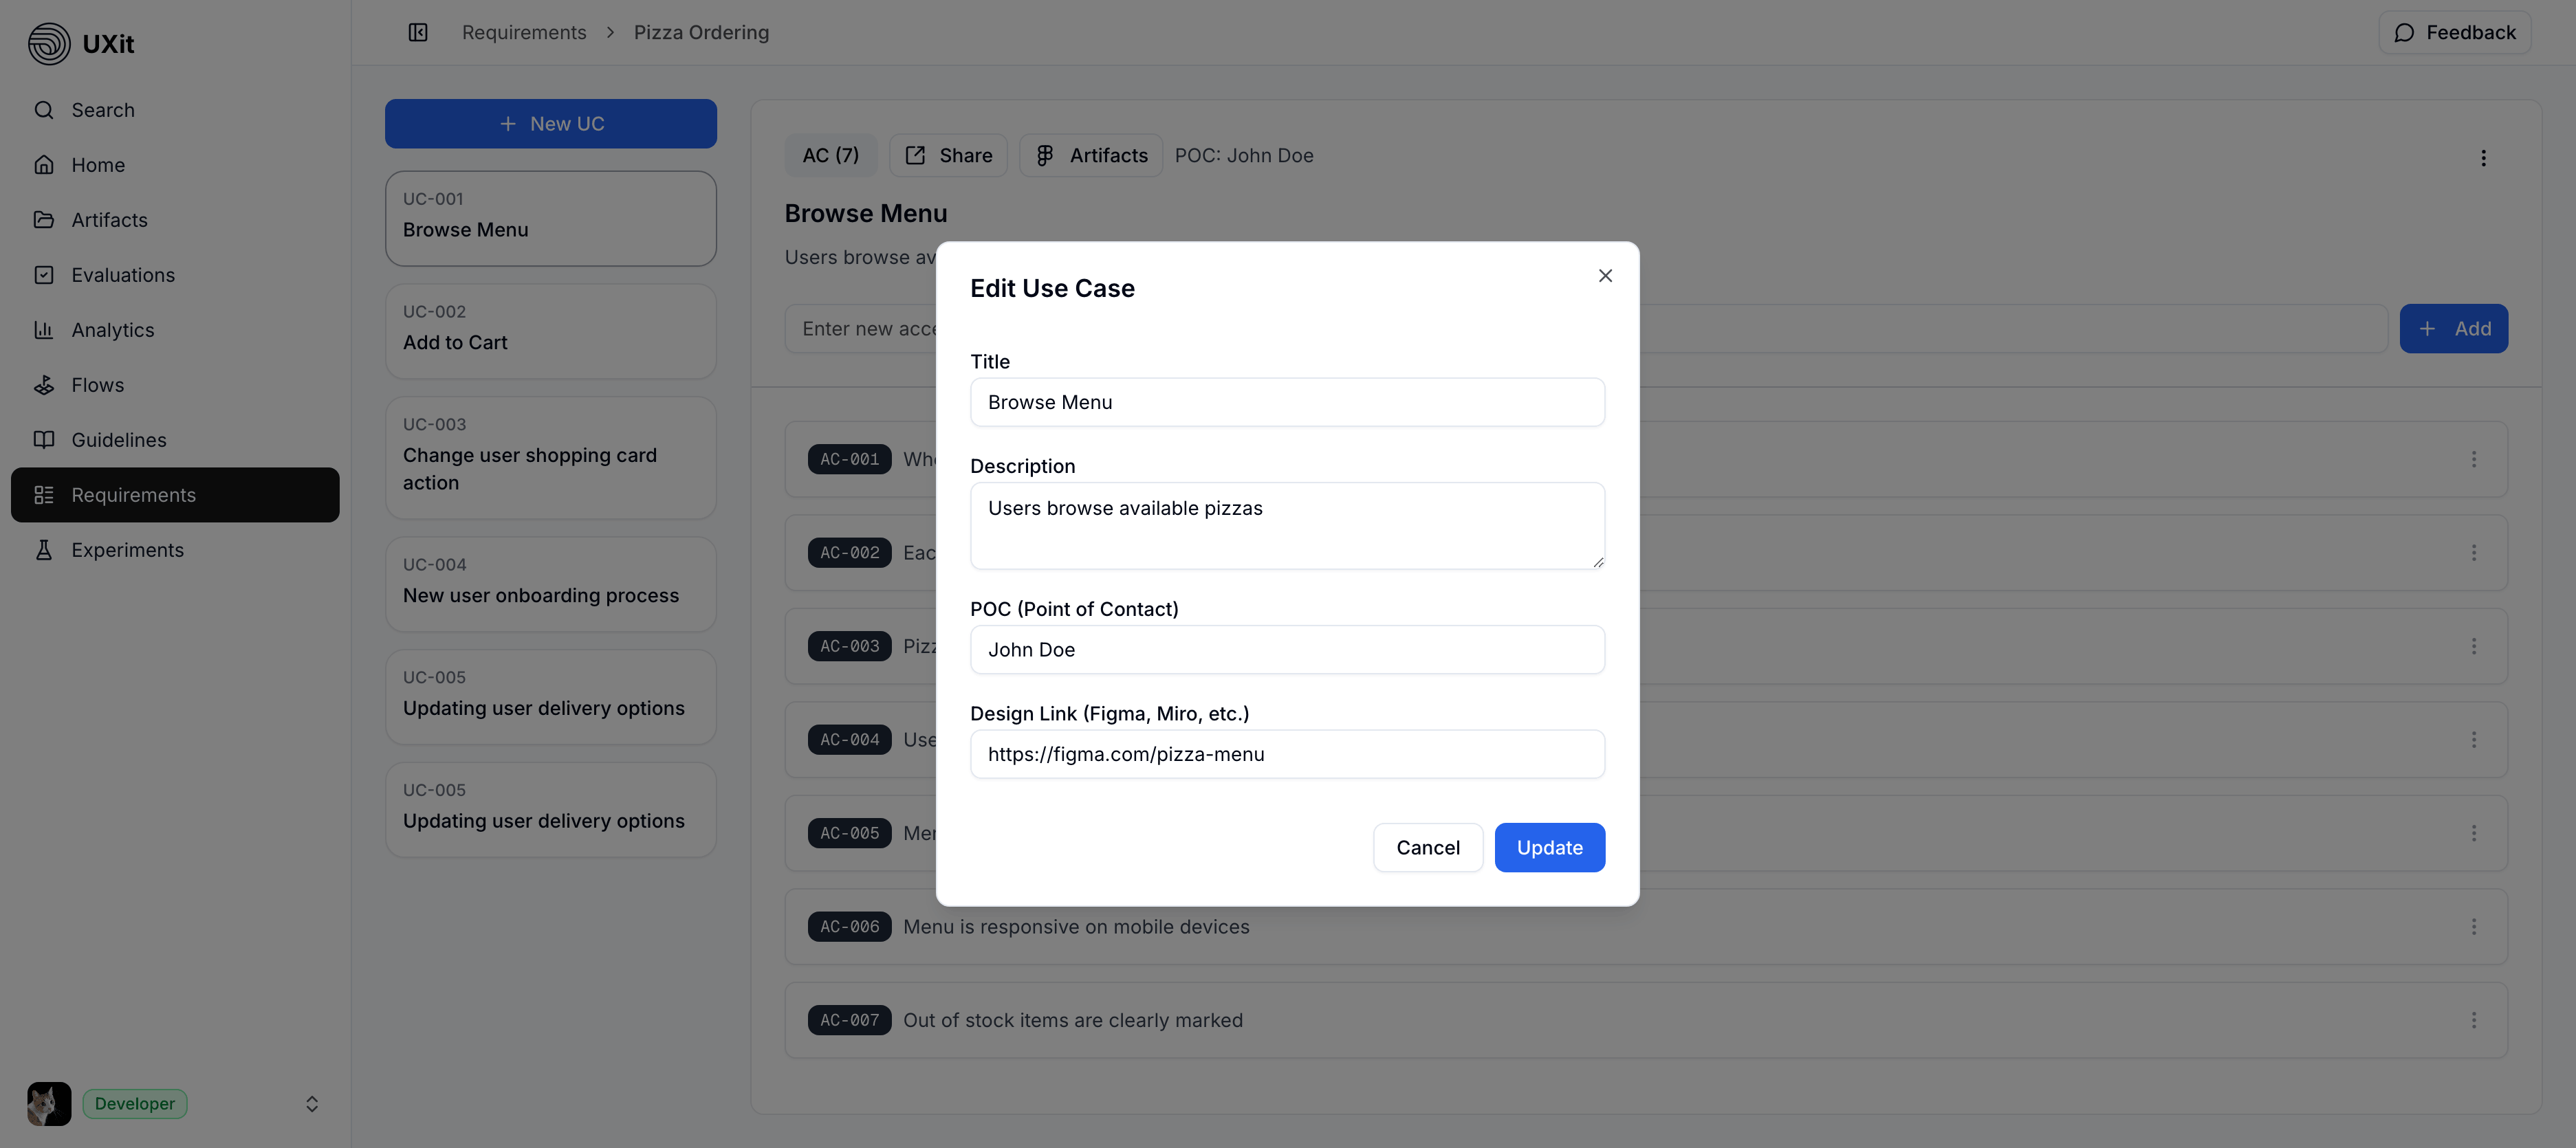
Edit A Use Case
Use Edit Use Case to update:
- Title: Short name for the scenario in lists and headers.
- Description: Extra context when the title alone does not carry enough detail.
- POC (point of contact): Who owns or leads this use case, for example the product lead or person accountable for the work.
- Design Link: URL to a mockup, wireframe, or prototype tied to this scenario.
Delete A Use Case
Warning
Deleting a use case is permanent and cannot be undone.
Deleting a use case removes it from the requirement.
If the deleted use case was selected, UXit falls back to another available use case when one exists.
Best Practices
- Use clear titles such as
Create account,Browse plans, orComplete checkout. - Keep the title concise and put supporting context in the description.
- Keep the use case itself short and direct: spell out the scenario, not the full delivery plan. Broader scope, fine-grained behavior, and longer explanations fit better in acceptance criteria, where they can be tightened into testable checks.
- Start with the primary path before documenting edge cases.
- Add acceptance criteria immediately after creating the use case so the scenario becomes testable.
- Add a POC (point of contact) when ownership matters.
- Add a design link when the use case maps to a mockup, wireframe, or prototype.