Creating Requirements
Create requirement containers for feature areas, then organize them with use cases and acceptance criteria.
Overview
Requirements are the top-level containers for product capabilities or feature areas in UXit. They help you organize work from a high-level feature idea down to the specific behaviors you want to define and review.
Requirements in UXit follow this structure:
Requirement -> Use Case -> Acceptance CriteriaEach level adds more detail and specificity.
- A Requirement defines the feature area or capability being delivered.
- A Use Case breaks that requirement into a focused user scenario.
- Acceptance Criteria capture the specific behaviors that should be true for that use case.
Use this page to create and manage requirements. For more detailed guidance on use cases and acceptance criteria, see the related pages below.
Create A Requirement
- Open Requirements.
- Click
New Requirement - Enter the requirement details.
- Click
Create
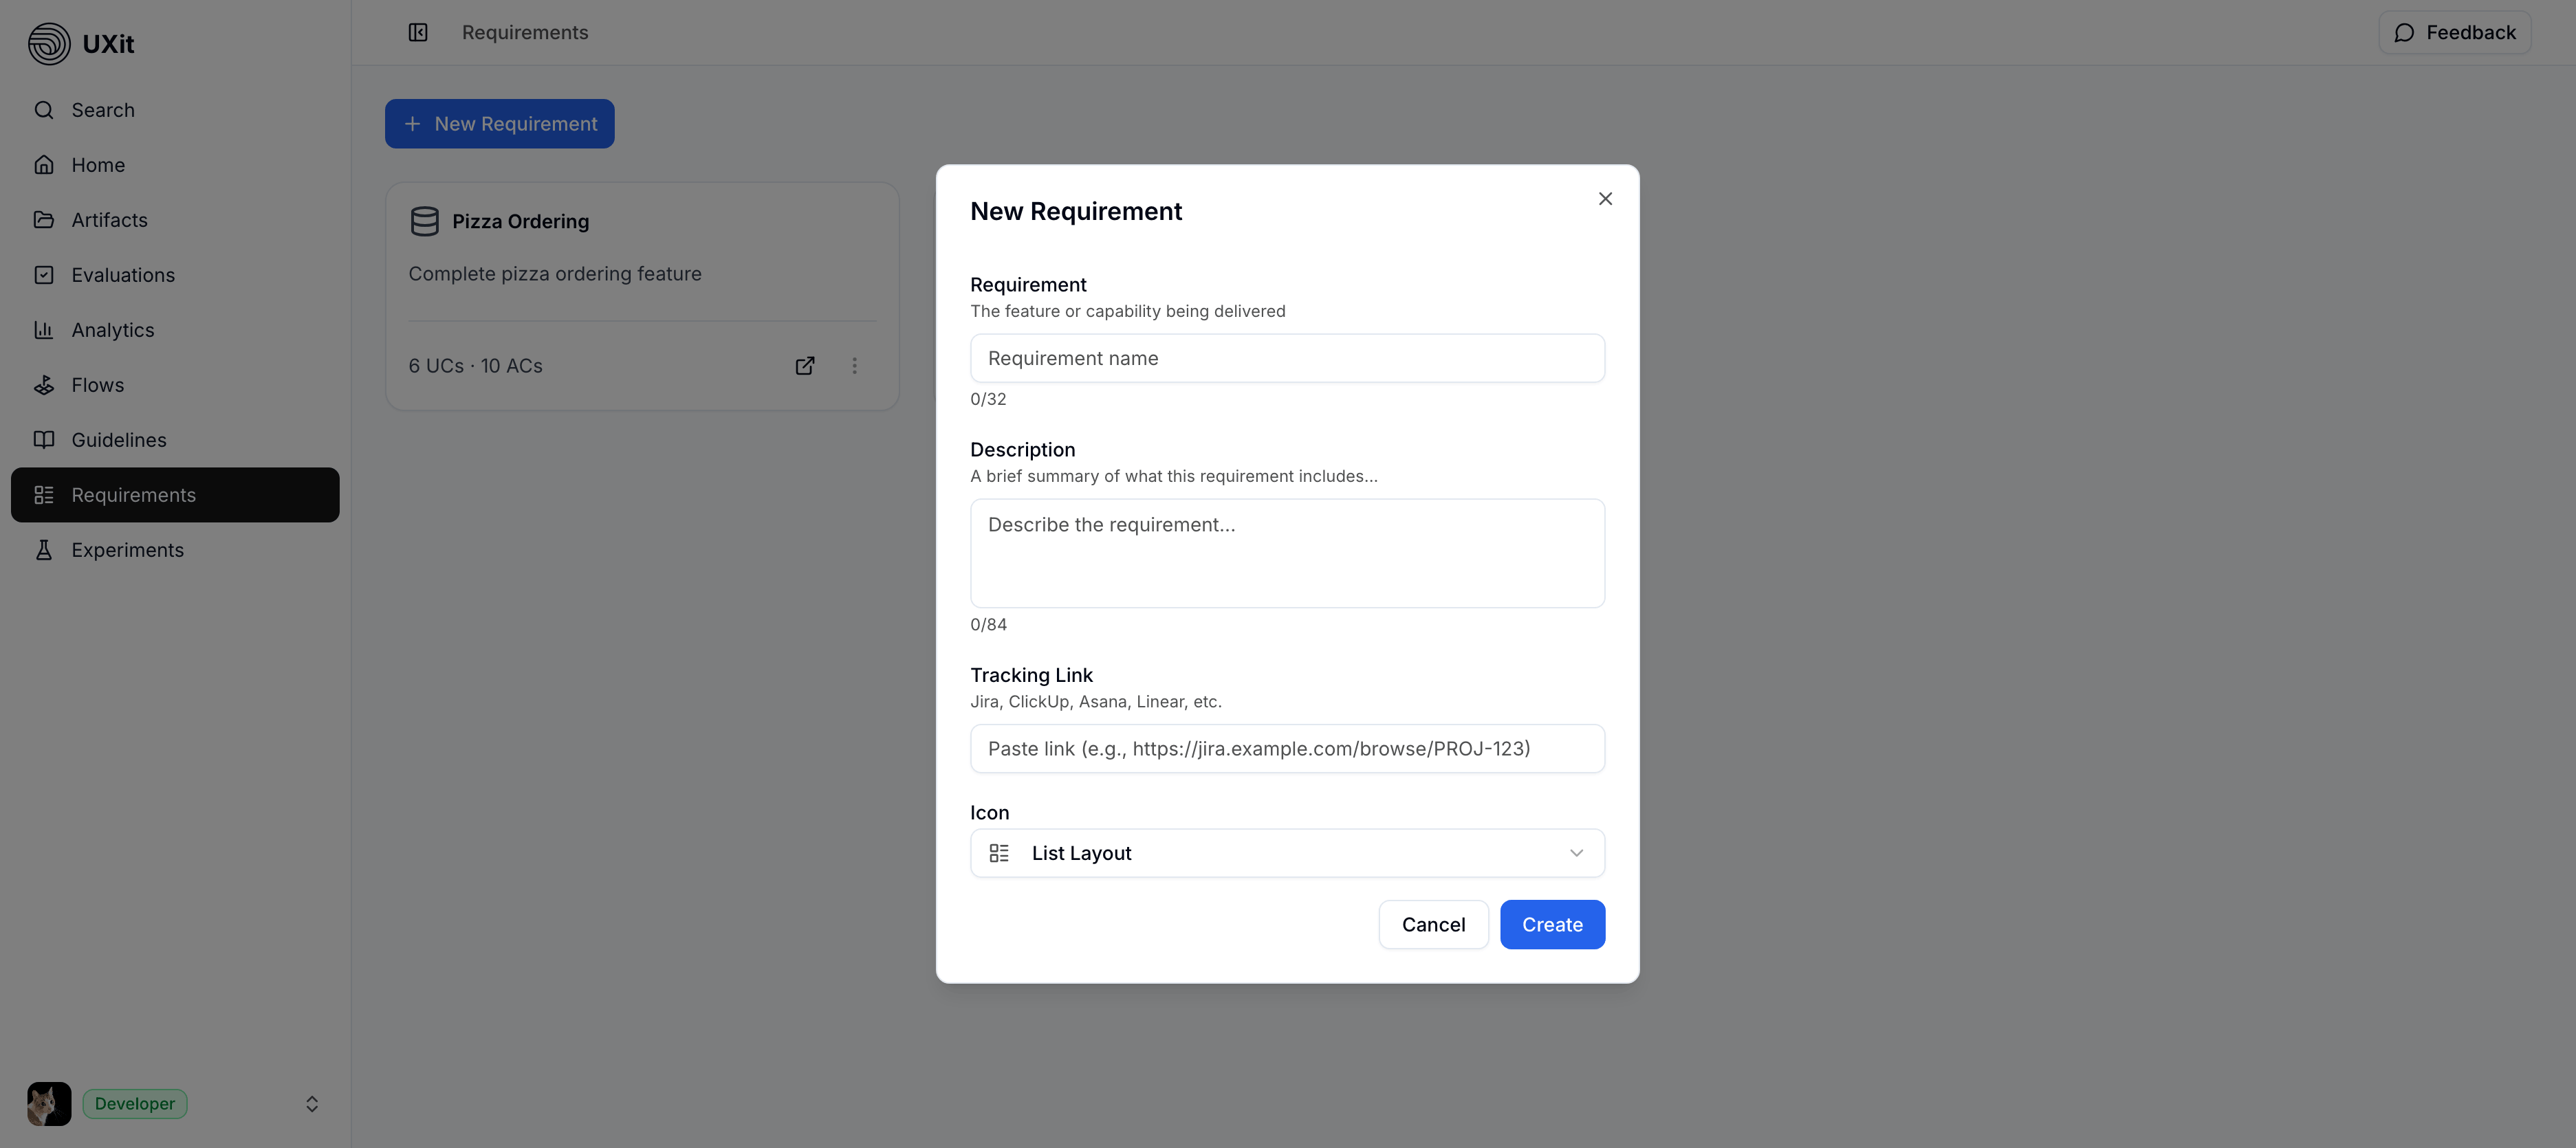
Requirement Fields
- Requirement: The name of the feature or capability being delivered.
- Description: A short summary of what the requirement includes.
- Tracking Link: A link to related work in tools like Jira, ClickUp, Asana, or Linear.
- Icon: A visual label for the requirement card.
After Creation
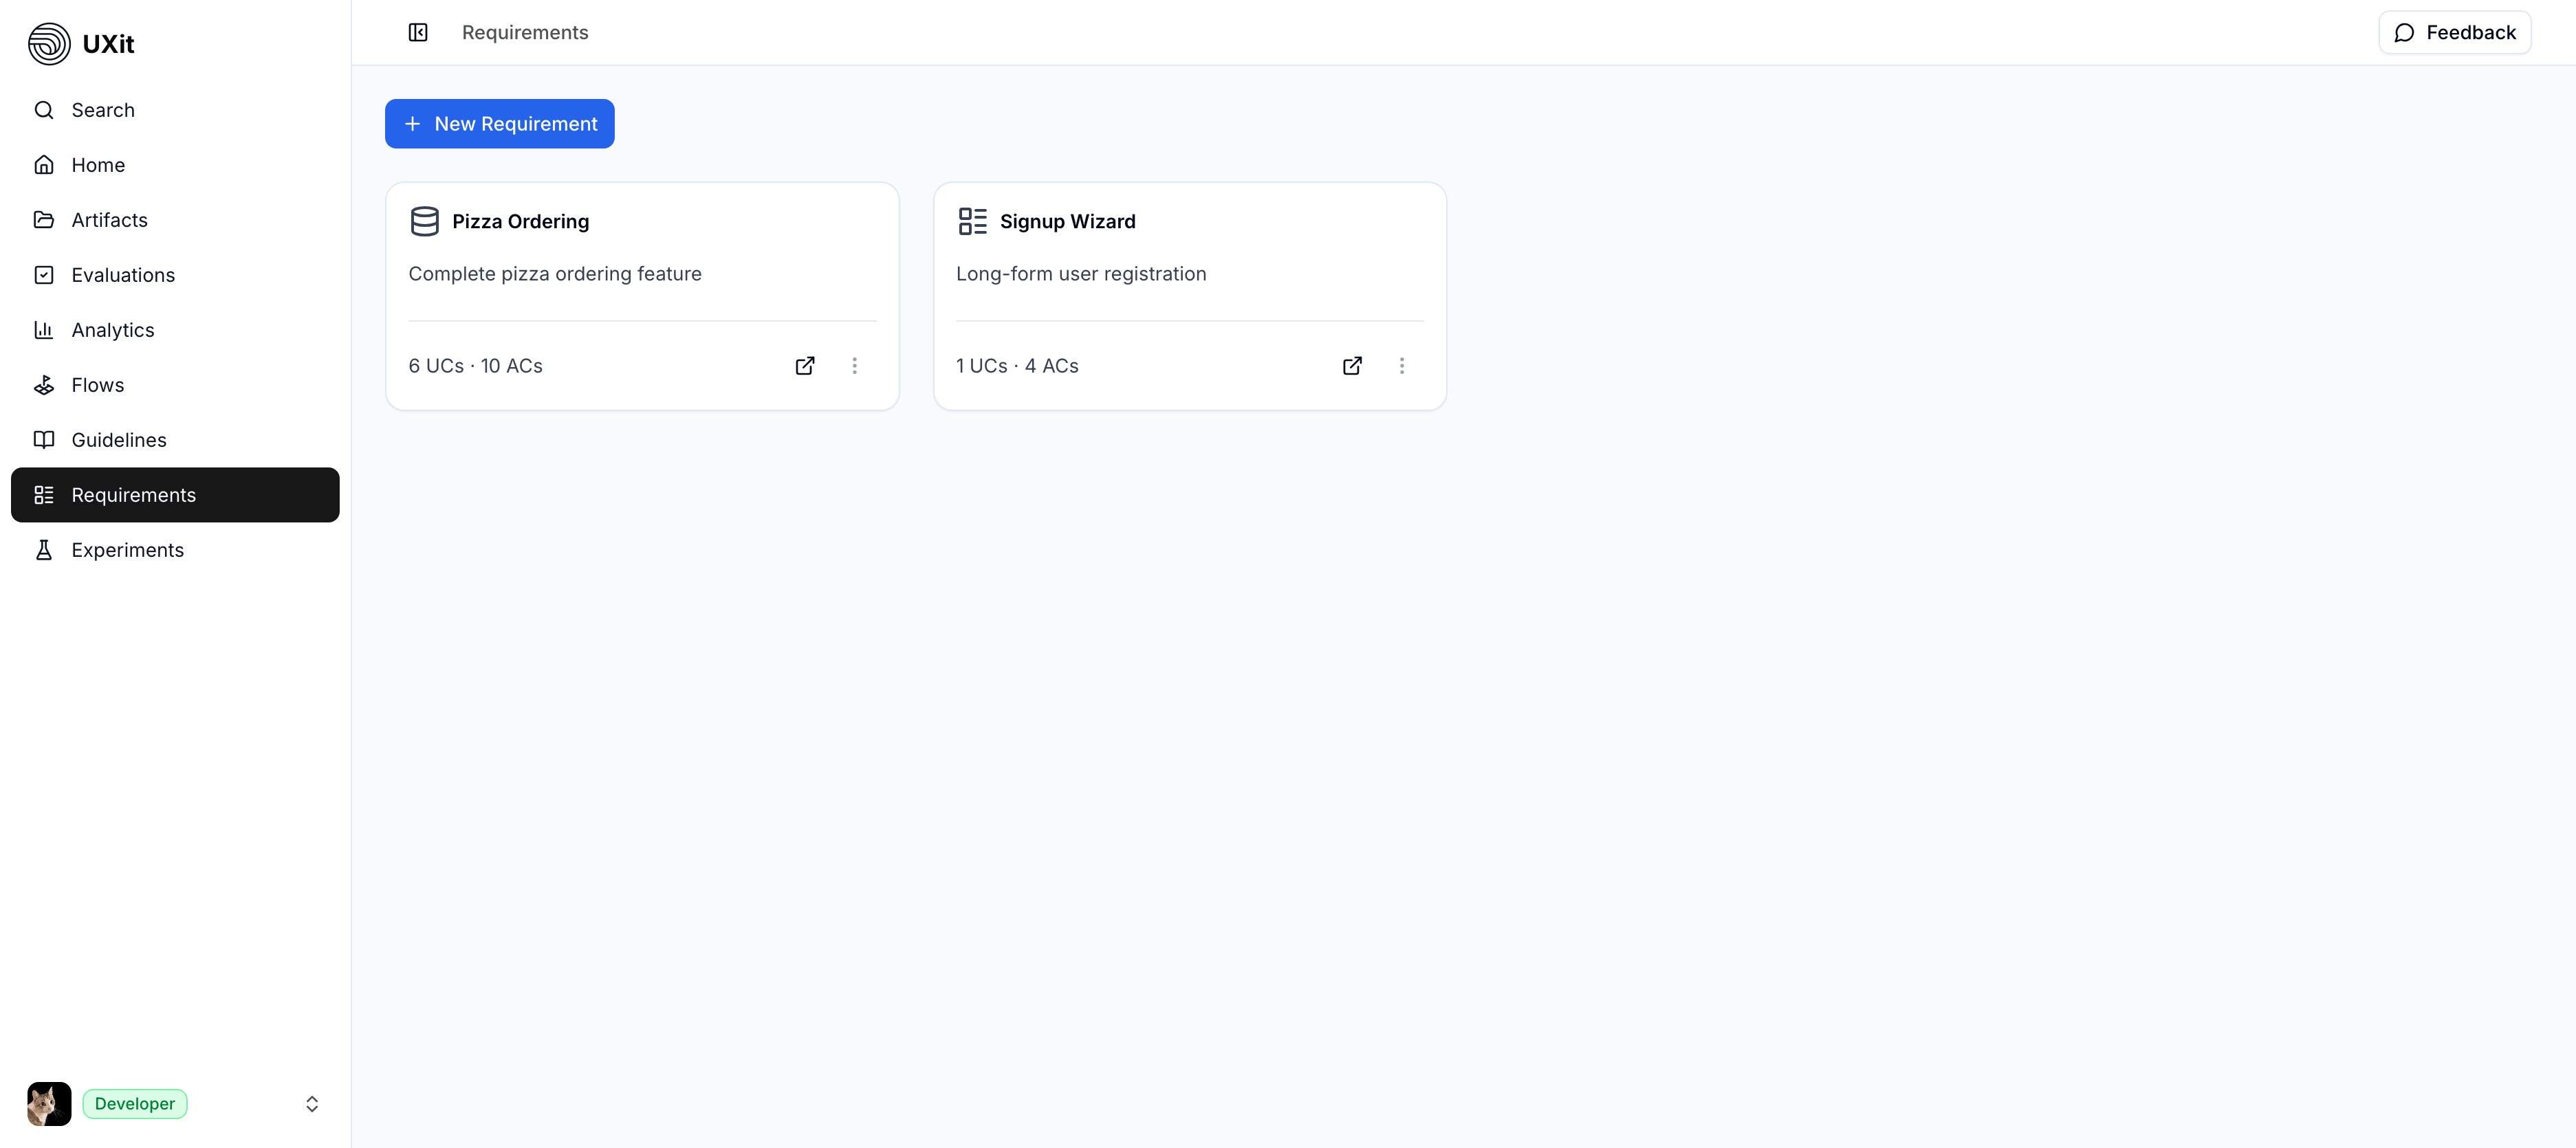
New requirements appear as cards in the Requirements list.
Each card shows:
- Requirement title.
- Short description.
- Use case and acceptance criteria counts.
- An external-link action when a tracking link is present.
- A more-actions menu.
Manage Requirements
Open the requirement card menu to manage an existing requirement.
Current actions include:
Change IconEdit requirementShare requirementDelete requirement

Changing Requirement Icons
Use Change Icon to update the icon shown on the requirement card.
Tip
Requirement icons are purely visual. Like guideline category colors, they are used for faster recognition and scanning, but they do not affect functionality, scoring, or any other system behavior.
Building Out Requirements
After creating a requirement, you can continue refining it by adding use cases and acceptance criteria.
- Use cases break the requirement into focused user scenarios.
- Acceptance criteria define the specific behaviors that should be true for each use case.
For step-by-step guidance, see the dedicated Use Cases and Acceptance Criteria pages.
Best Practices
- Keep each requirement focused on one feature area or capability.
- Use clear, short names that are easy to scan in the requirements list.
- Add a description that quickly explains what the requirement covers.
- Include a tracking link when it helps connect work across tools.
- Start broad at the requirement level, then add detail through use cases and acceptance criteria.